under pressure!

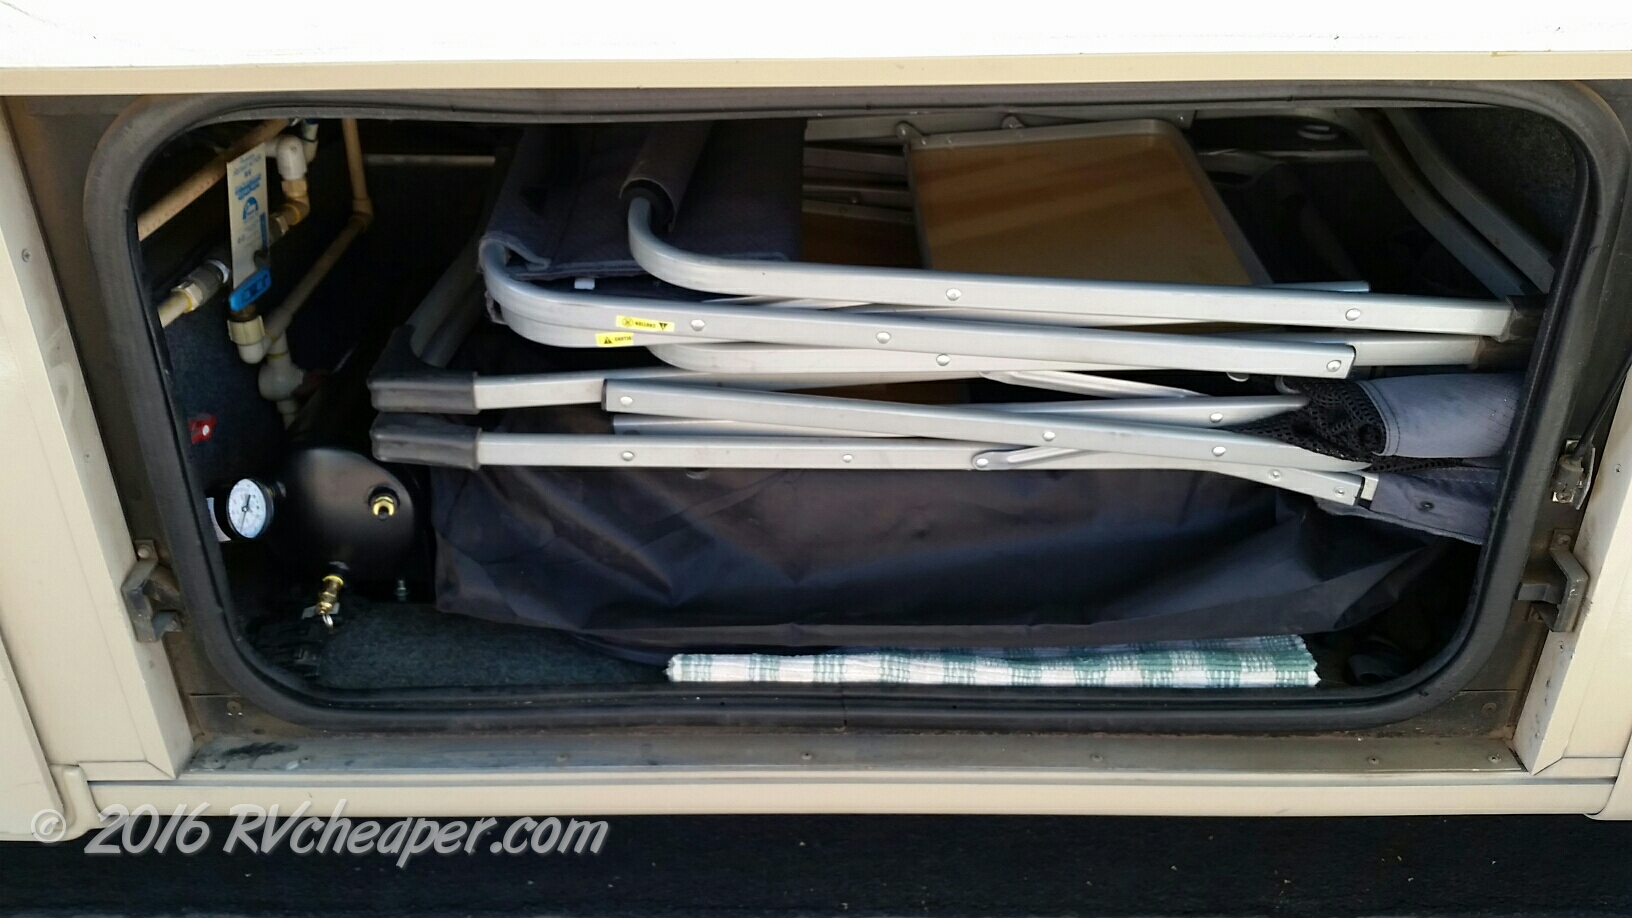
Since we got the Bounder I’ve had to air up the rear bags before every trip. I know there’s a minor leak some where but with it only leaking down after 30-45 days, the tank is still a great long term accessory even after I fix the leak.  For this old of a coach, I didn’t want the expense of a built in compressor, I’ll wait on that for when we move up to a Diesel pusher in a few years.

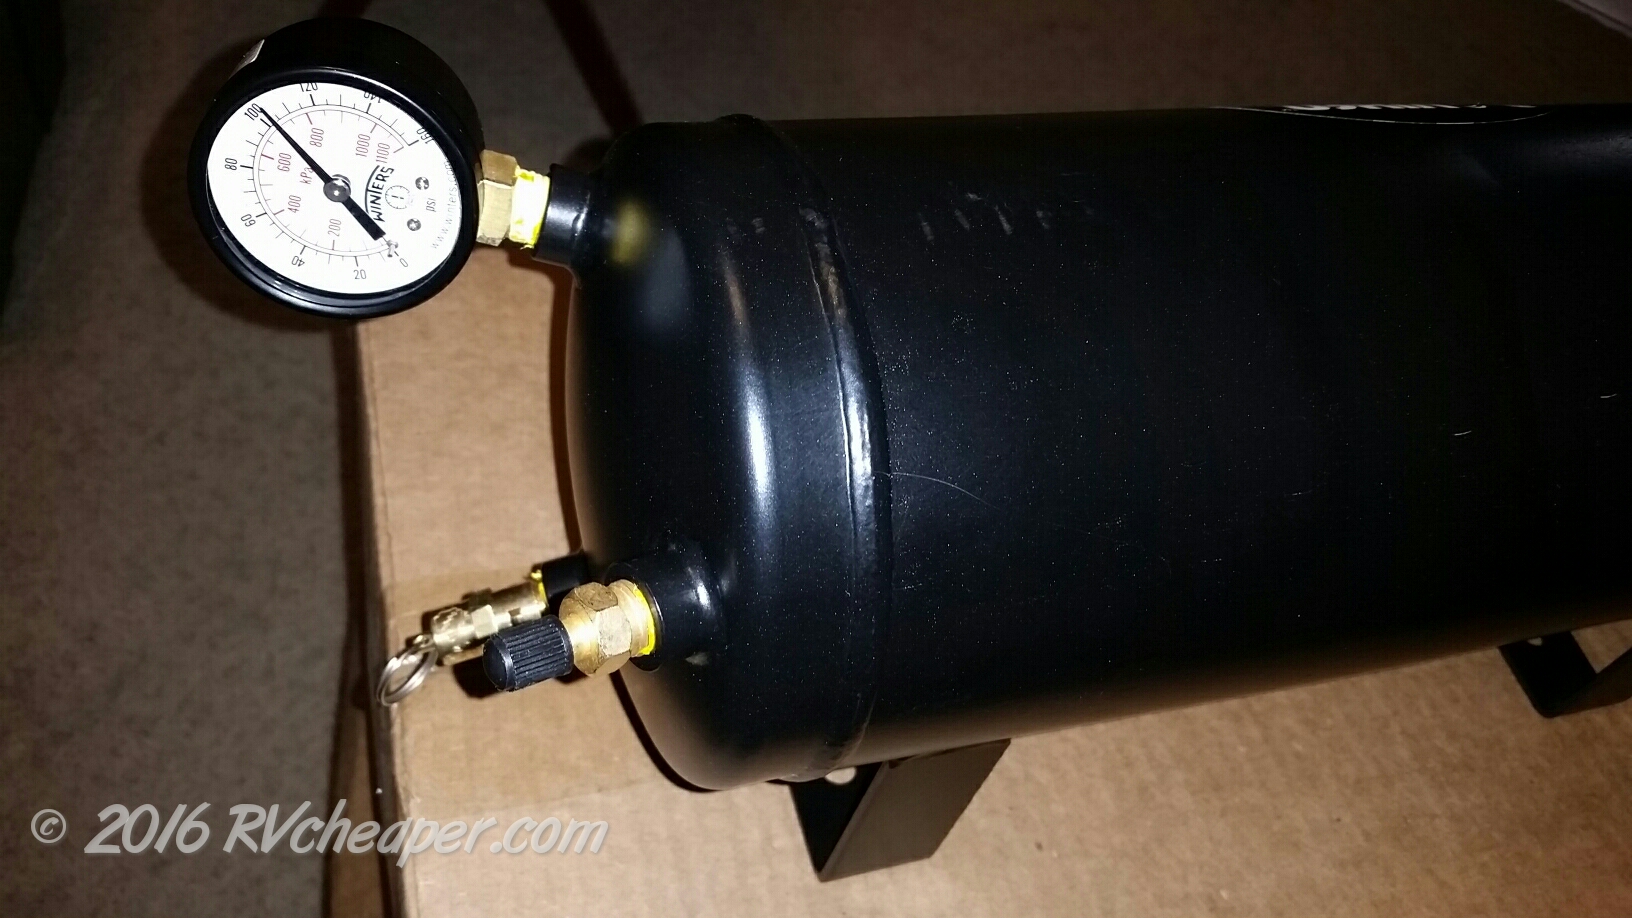
After a lot of shopping around I found a cheap 1.5 gallon tank for air horns. It was cheap and the right size so I don’t lose space in the basement. I added a tire valve, a gauge, pressure release valve and leak proof ball valves. Instead of spending $250-$350 for a fancy automatic air bag system, I got by for $95 for a tidy little manual system.

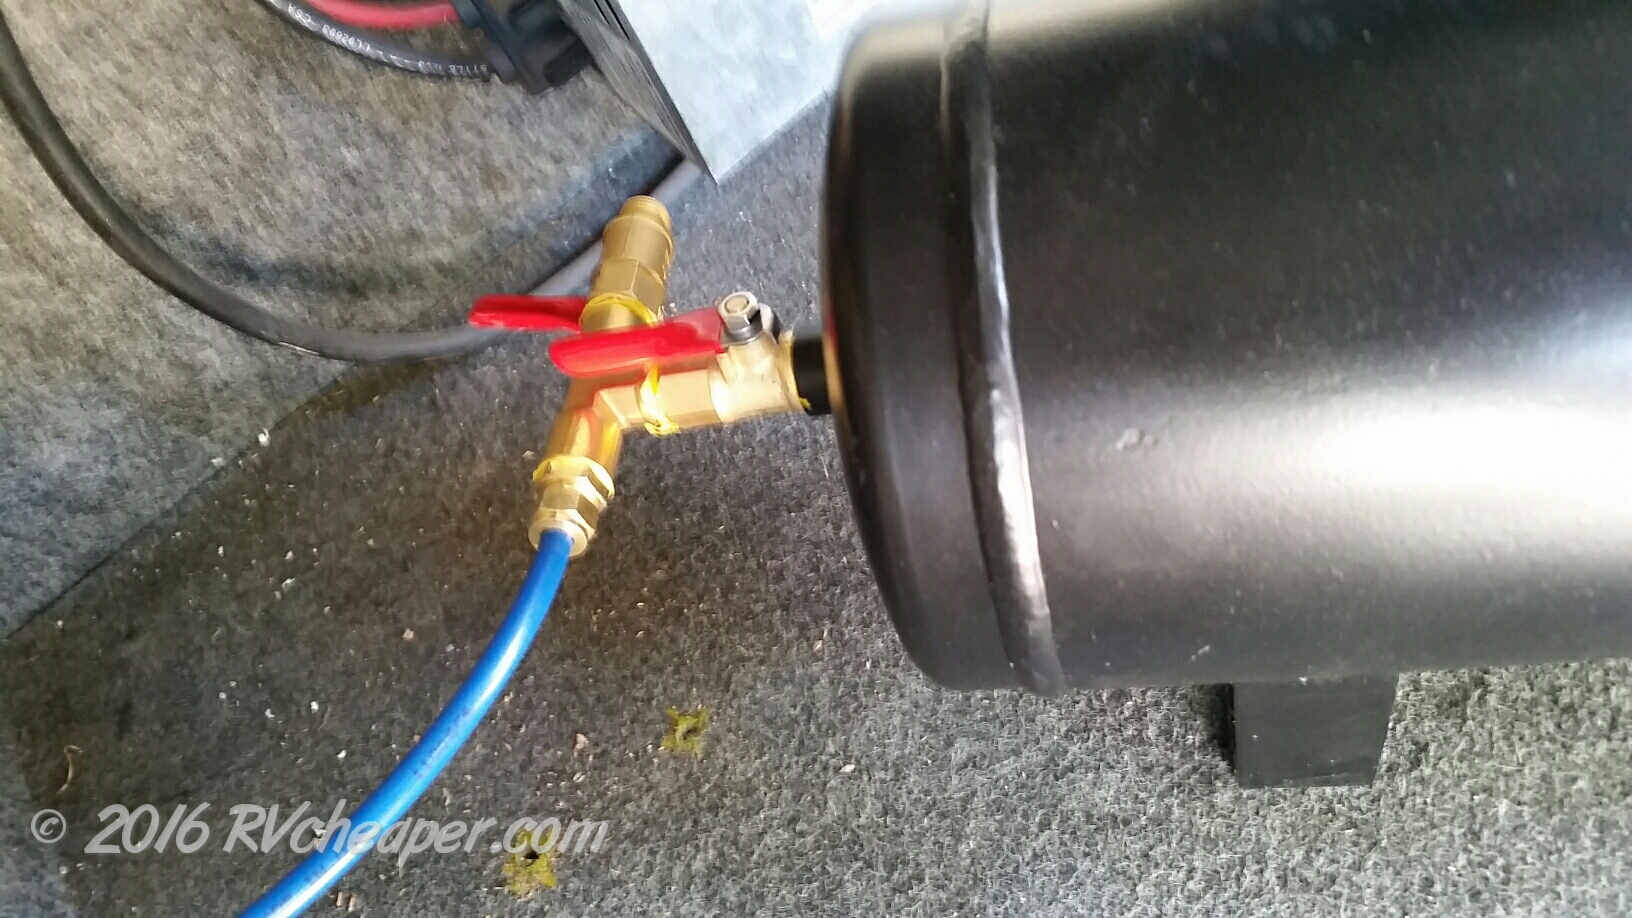
I added a valve to keep pressure in the tank when I drain the air bags. As it turns out, the tank valve is the perfect way to maintain pressure while the tiny leak near the bags leaks off some of air. This fall when it gets cool enough I’ll go trace down the leak, but for now the tank has held air for two full months with only a 20psi loss after that time.

Here’s the parts list and cost.

  • Vixen 1.5 gallon tank: $60
  • Side mount pressure gauge: $12 (the back mount the tank came with is not be visible where I mounted the tank)
  • Tire Valve with 1/2″ pipe thread: $6
  • Ball type water drain valve: $5
  • Fittings and two extra ball valves for controlling air flow to bags: $12

Once I assembled the tank, fittings, valves and gauge, I did an under water leak check. The only leaks will be the fittings under the RV until that gets my attention in cool weather.

2016-06-08-21.15.50_wm.jpg.jpg
The end facing out when I open the basement door. I replaced the back mount gauge with a side mount so I can read it without unloading the basement. Tire fill valve and pressure relief valve are also just behind the basement door so nothing will block access.


2016-06-08-21.14.55_wm.jpg.jpg
The blue line is from the air bags. The red handle on the right lets me close flow out of the tank to maintain pressure in case I need to drain the air bags. The other red handle to the left and almost hidden drains the air bags. On one trip I found this was handy to drop the rear of the RV to level out before deploying the jacks. I had enough in the tank to re-inflate the bags when it was time to hit the road again!


2016-06-08-21.13.47_wm.jpg.jpg
Here’s the tank mounted to the floor. The gauge is below the top of the tank, the valves in the back are out of the way of accessories stored in the basement. Even loaded the valves are all still easy to reach. I chose a ball valve for the water drain since the original wing valves are prone to leaking within a year.


2016-06-08-21.12.56_wm.jpg.jpg
With the basement loaded back up, I still had space for chairs, patio mat, door mat and other accessories. The chairs sit nicely on the top of the tank without hitting valves or the pressure gauge. The got the job done, was easy to build/install and best of all cheap!


Leave a Reply

Please log in using one of these methods to post your comment:

WordPress.com Logo

You are commenting using your WordPress.com account. Log Out /  Change )

Twitter picture

You are commenting using your Twitter account. Log Out /  Change )

Facebook photo

You are commenting using your Facebook account. Log Out /  Change )

Connecting to %s

This site uses Akismet to reduce spam. Learn how your comment data is processed.